If you are anything like me—and the thousands of like-minded people out there—you definitely have at least a couple of old tees and shirts in the back of your closets. Either you haven’t worn them in a while, or you’ve been meaning to donate them but just haven’t gotten around to it.
Well, whatever the reason, fret not; I have a great DIY project for you! You’re going to be making a fabulous tote bag from one of those old shirts!
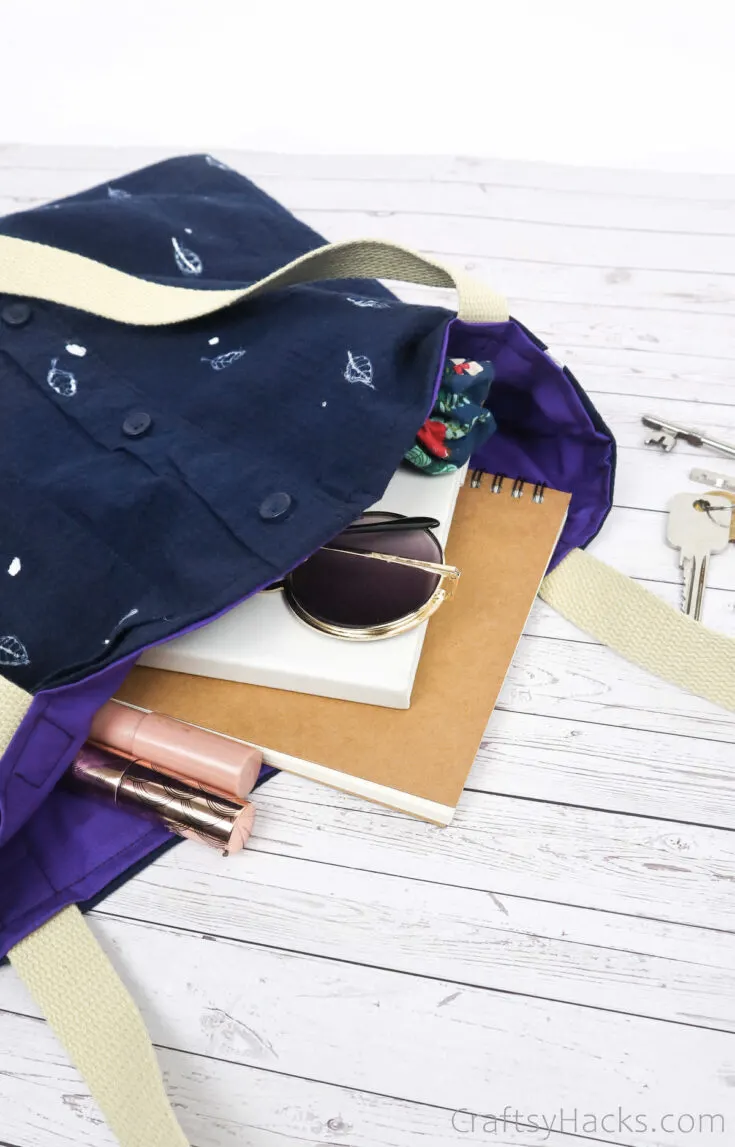
Don’t tell me you don’t need another tote—everyone does. They’re perfect for carrying groceries, books, towels on a beach trip…you get the point.
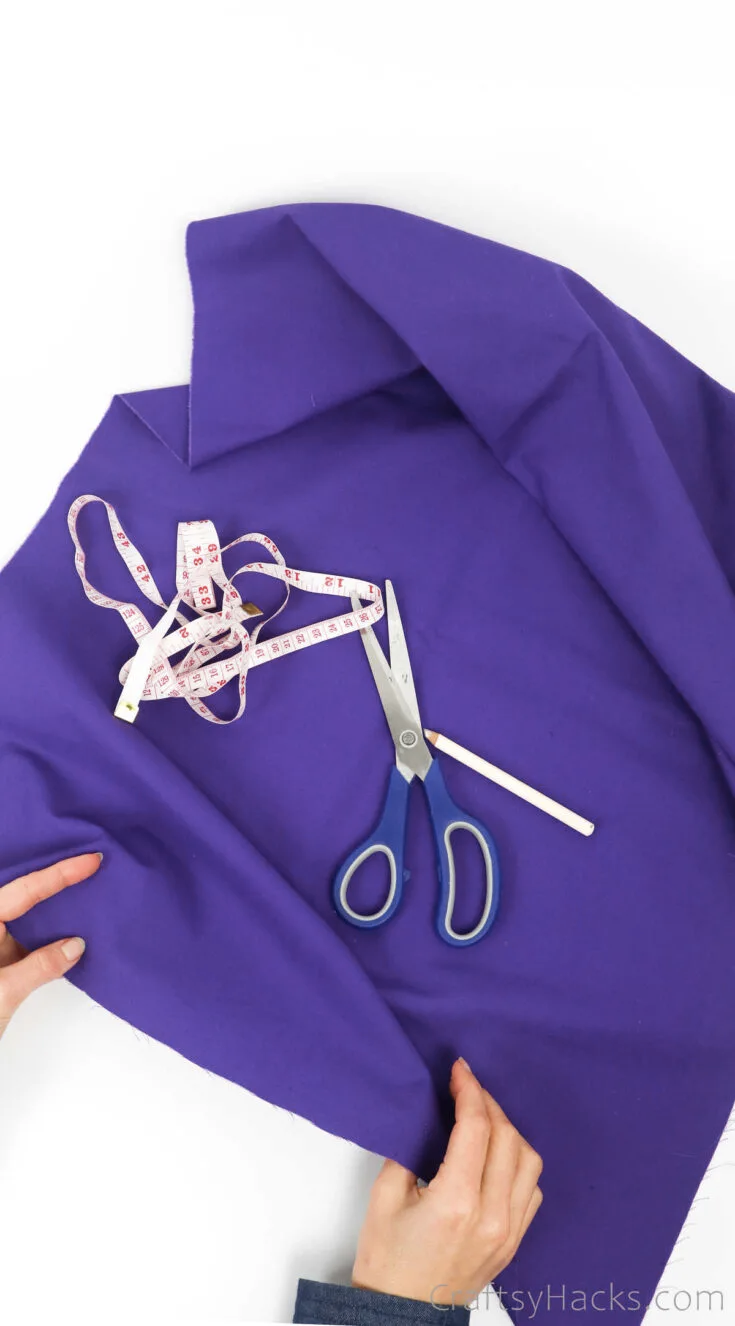
Supplies and Tools You’ll Need
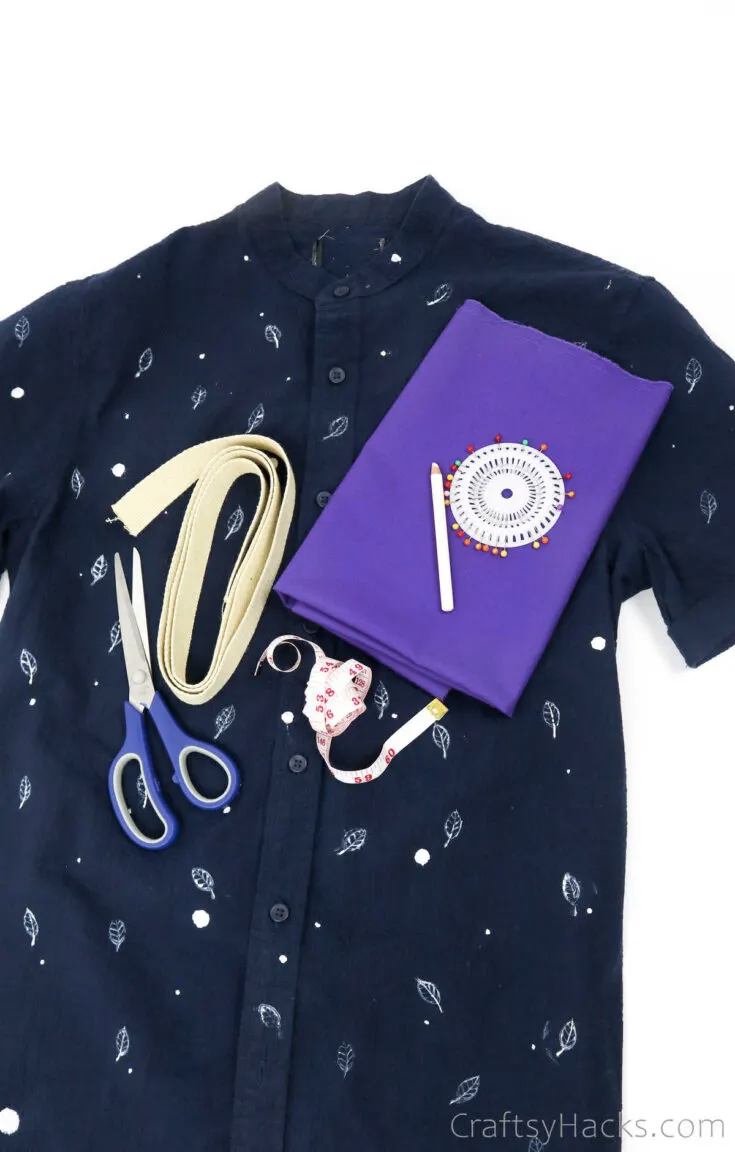
If you’re ready to begin, here’s a list of supplies you’ll need:
Cotton shirt
Polycotton fabric (40″x 40″)
Scissors
Sewing pins
Tape measure
Fabric pencil
52″ cotton webbing
How to Make a DIY Tote Bag
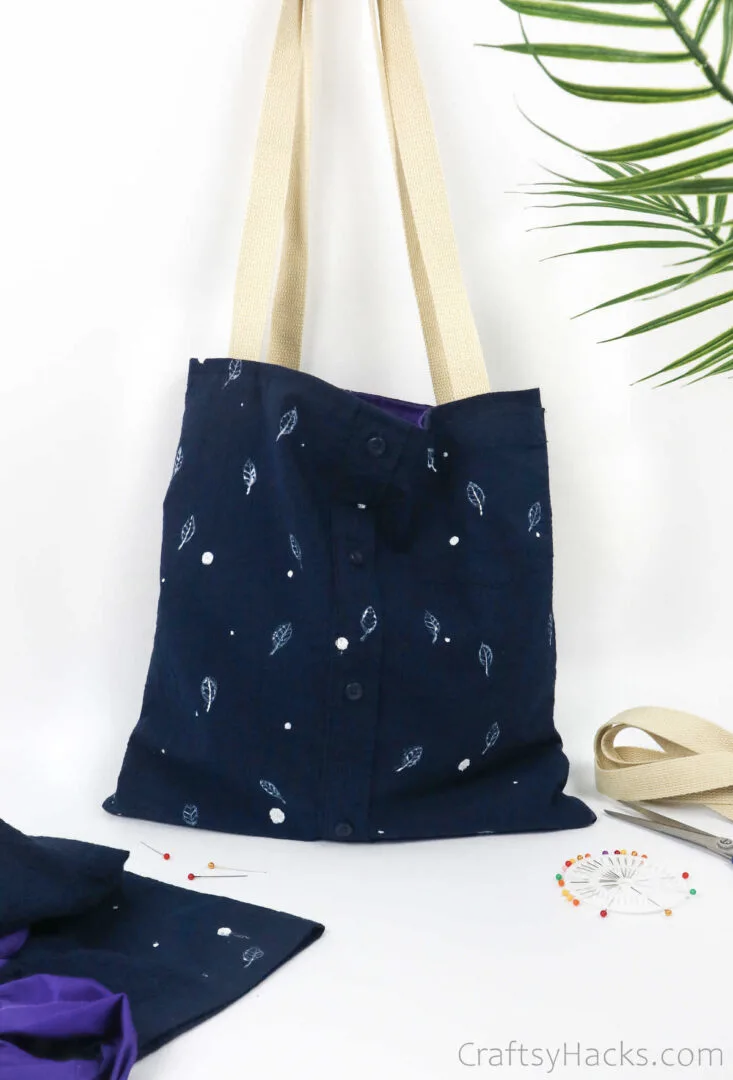
If you happen to pick a button-down shirt or one with cool decal work, embroidery, or trendy designs on it, your tote will look even more fabulous. So go ahead and pick out a shirt from your stash.
Also, know this: the size of the bag will be the length between the sleeves of your shirt!
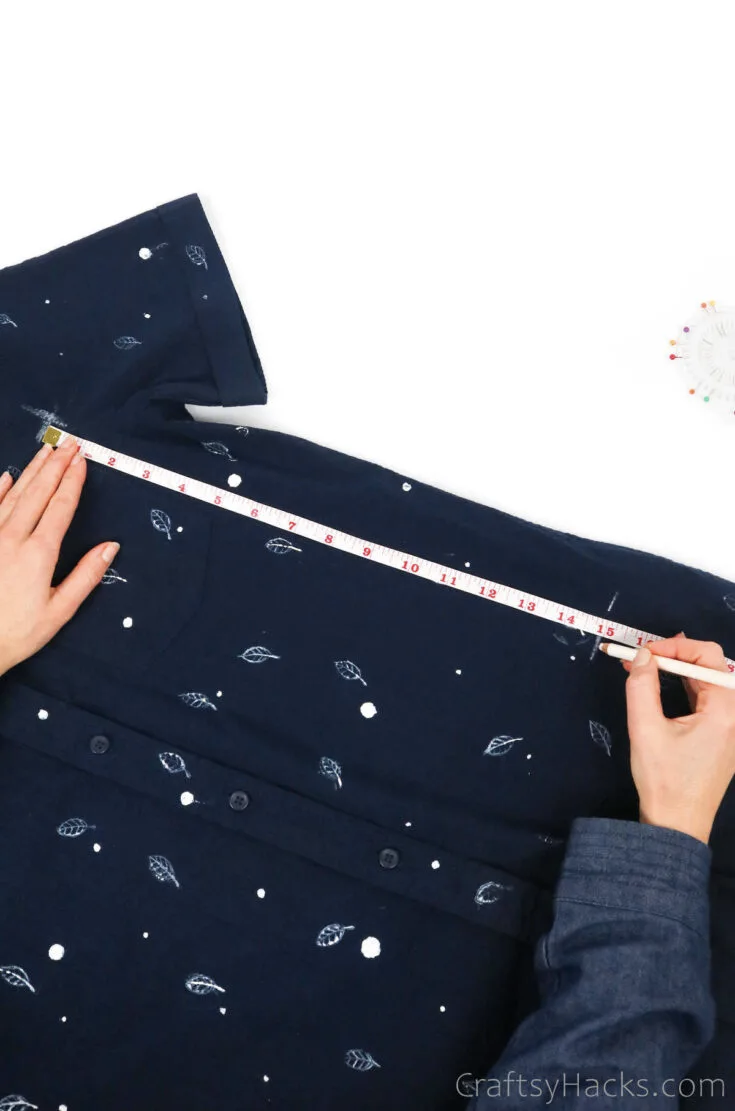
Step 1
The first step after you’ve picked out your shirt is to mark the spot just under the sleeve on either side.
Then, go ahead and connect all four dots, and you’ll be able to see the dimensions of your bag.
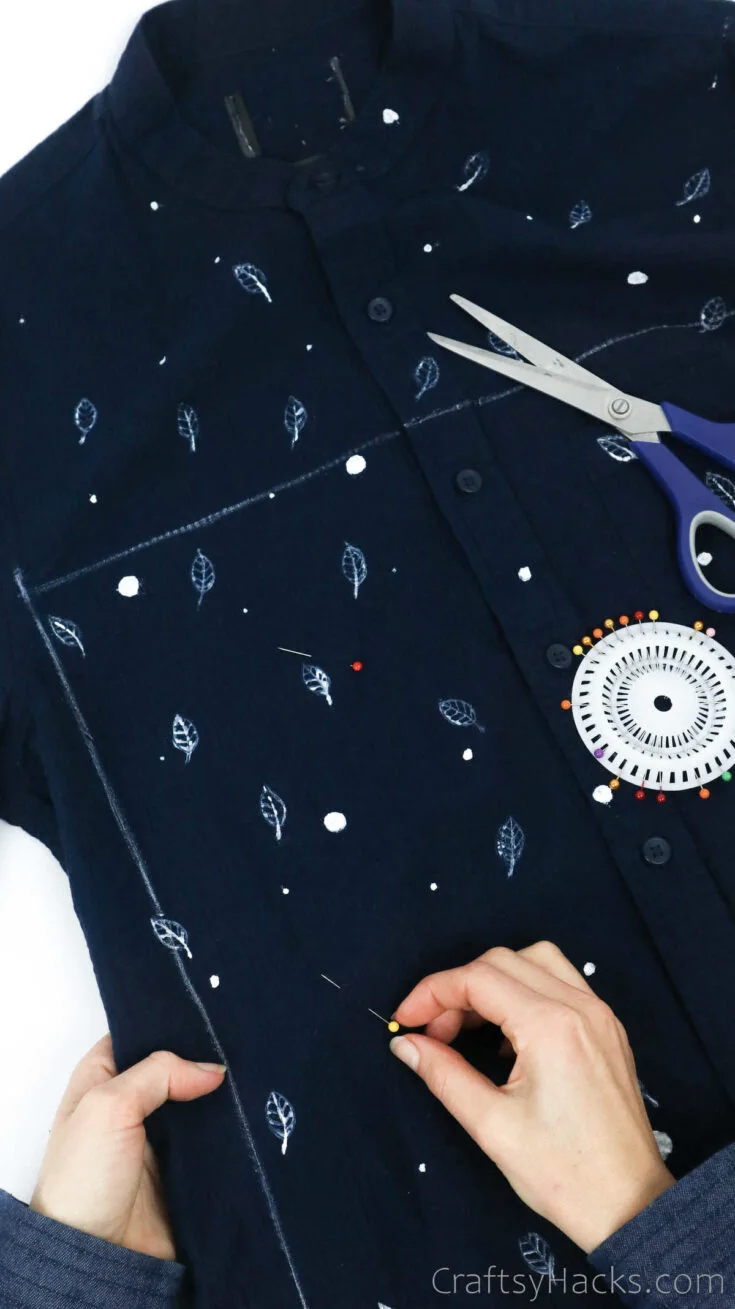
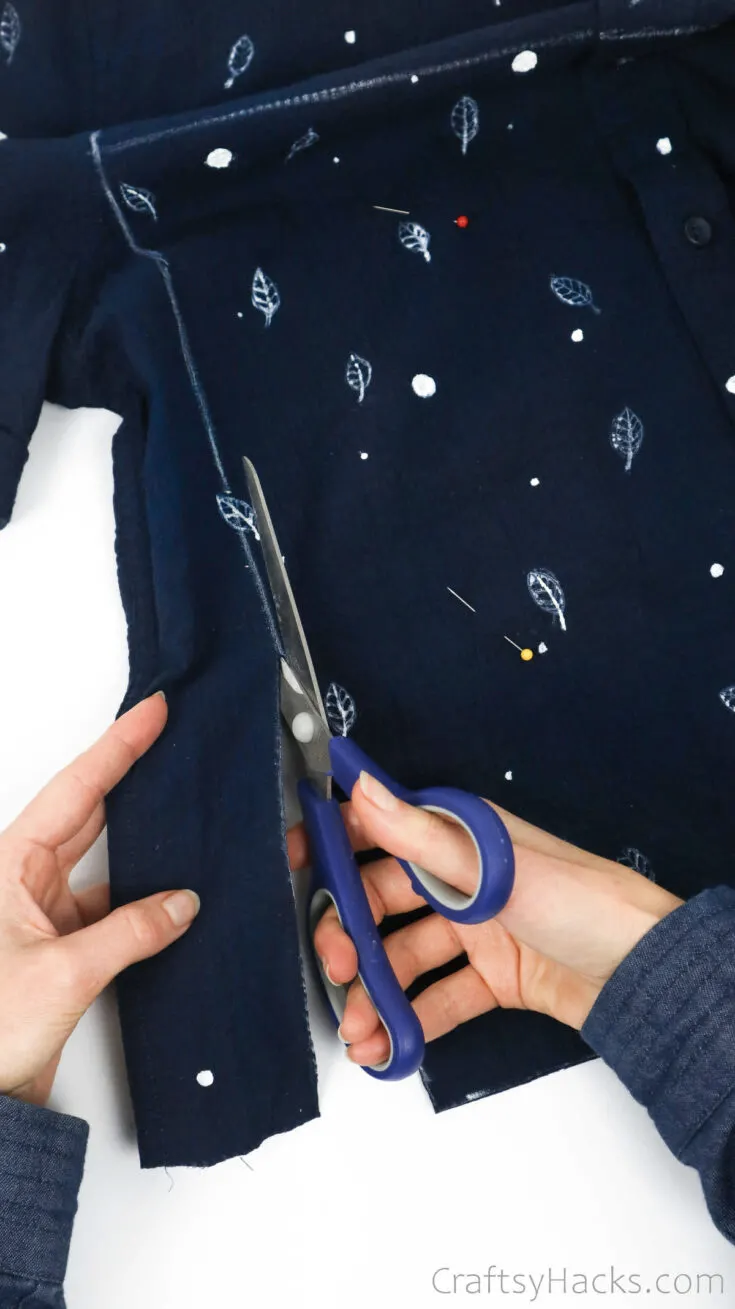
Step 2
Before you start cutting into your fabric, you should probably use a few sewing pins to pin the two layers together. That way, they won’t move around while you cut them.
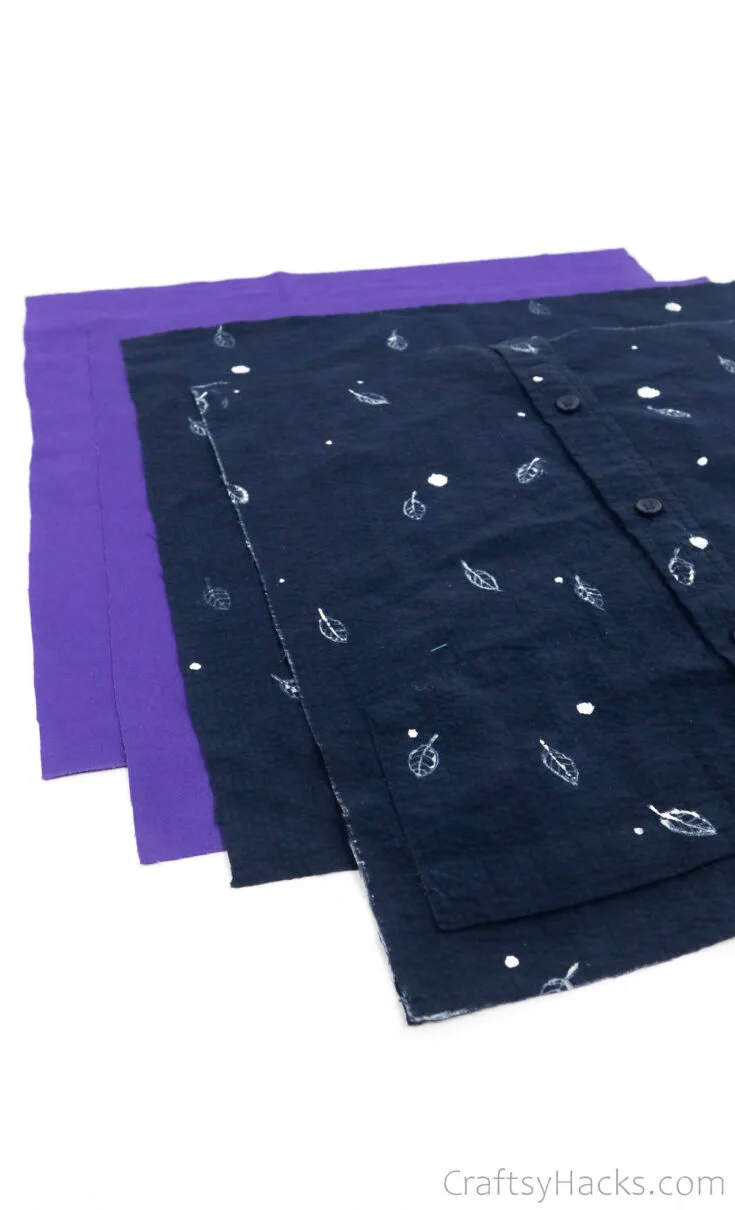
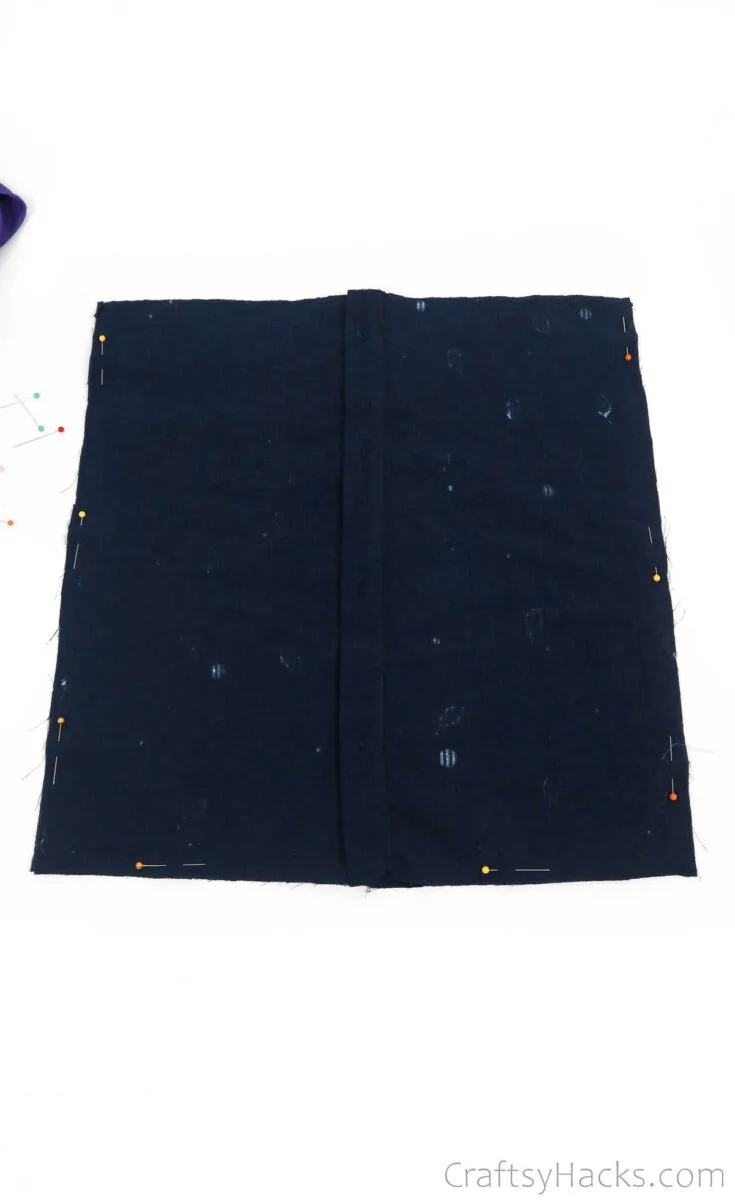
Once you’ve cut the shirt, you should have two swatches of fabric like this.
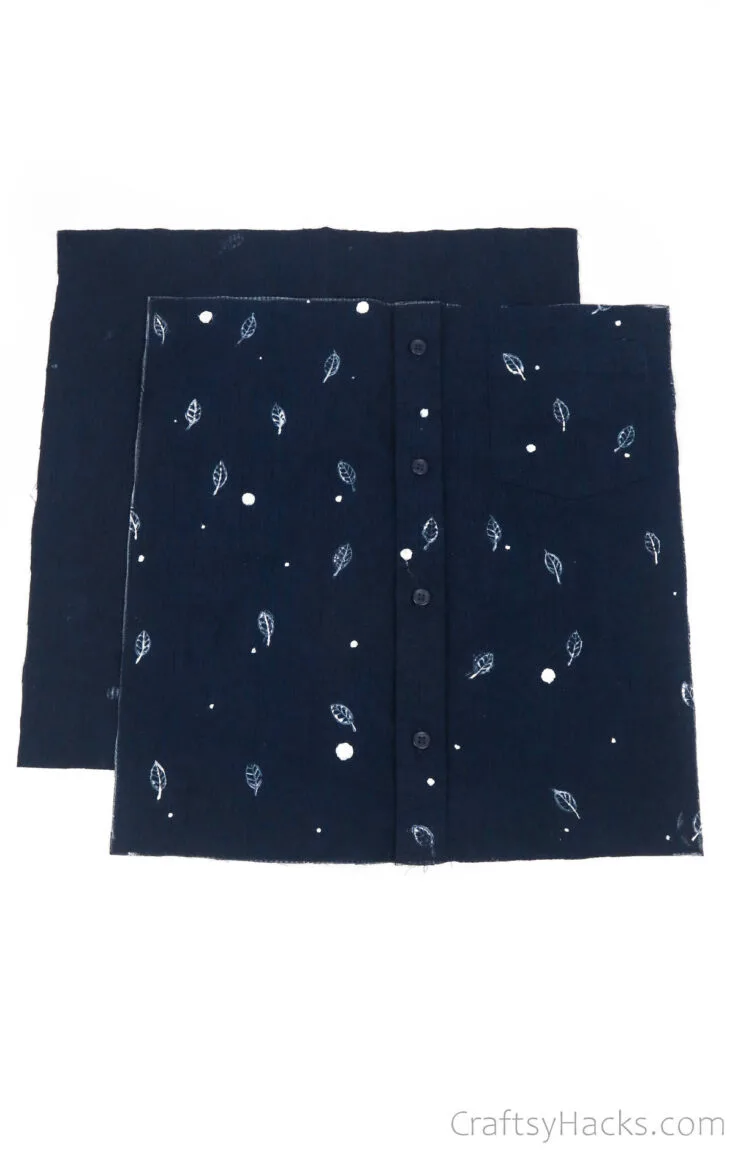
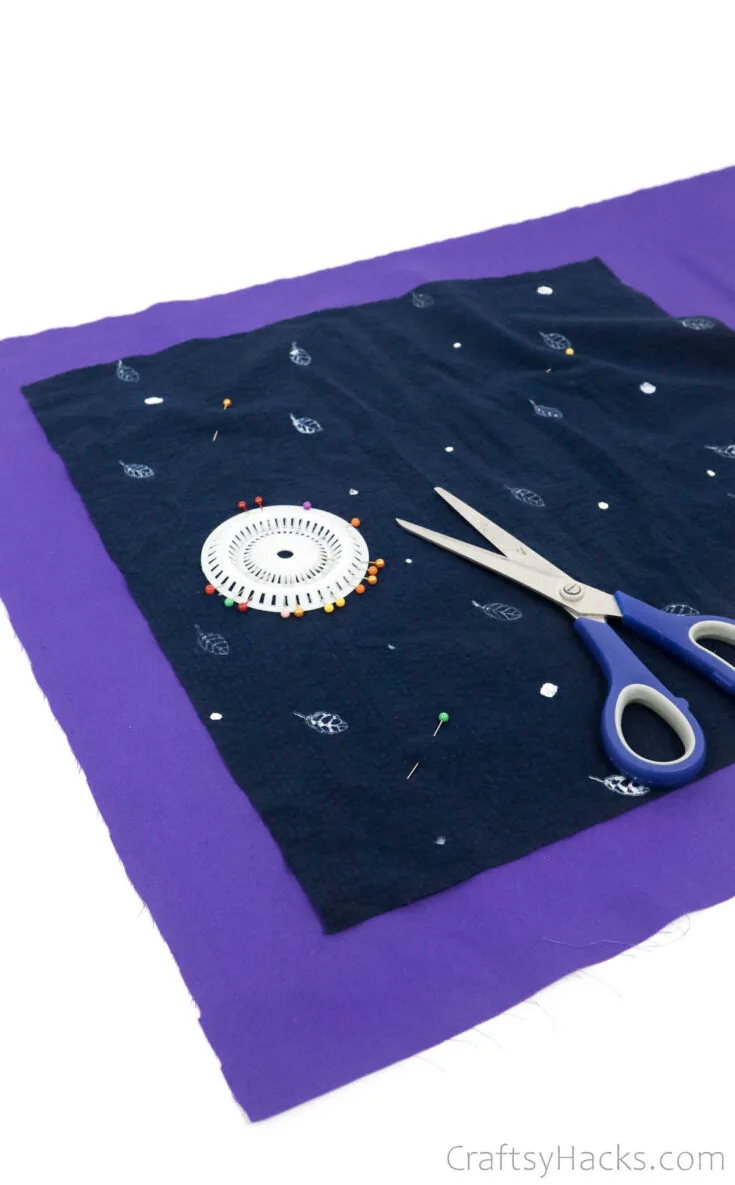
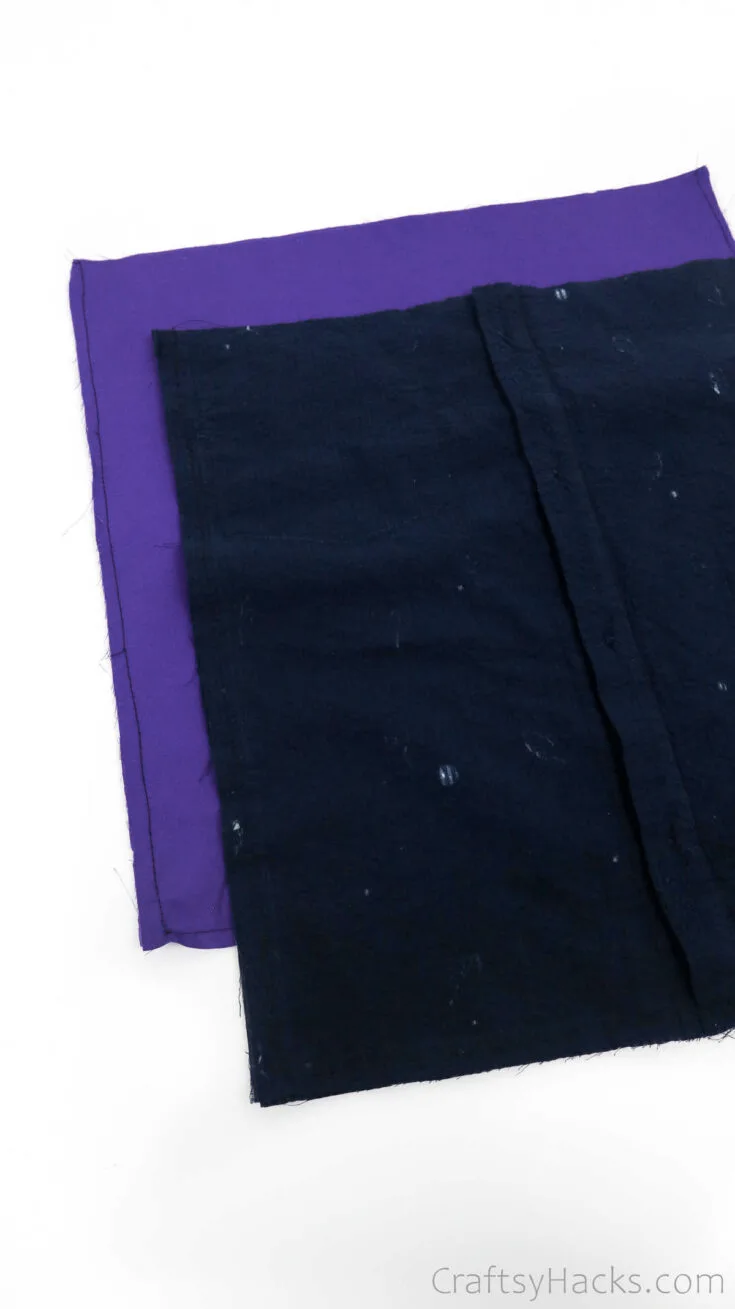
Step 3
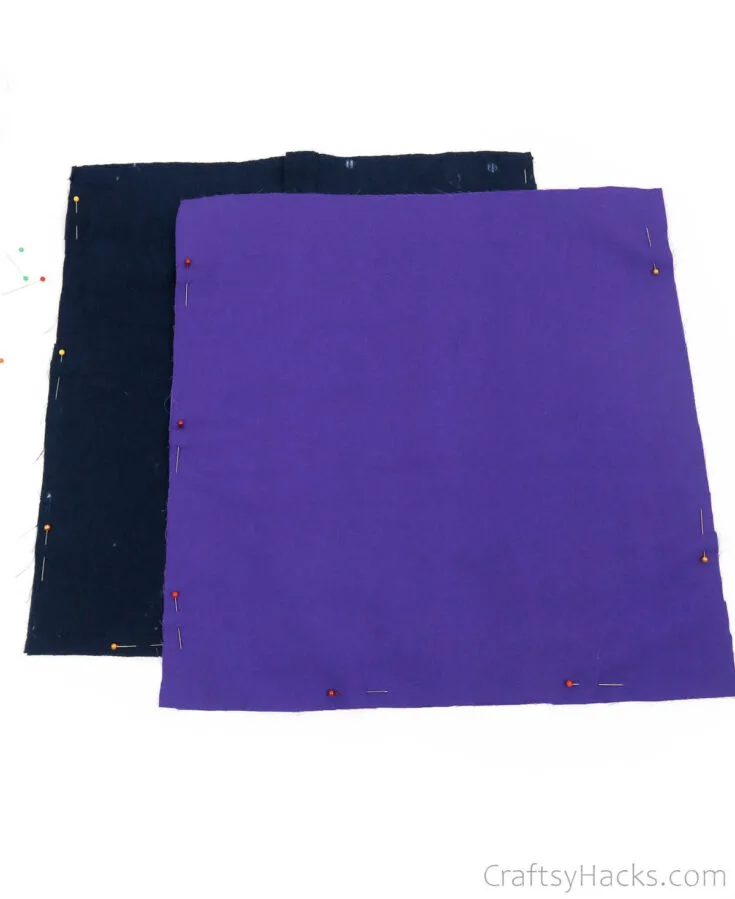
Next, you need to measure and cut out another fabric to use as lining. If your outer fabric is sturdy, then you can do without a lining inside. But lining will ensure that the bag is sturdier.
Simply pin the outer fabric on the lining fabric and then grab your scissors and start along the edges.
You should now have four swatches of fabric, two each for the lining and the outer material.
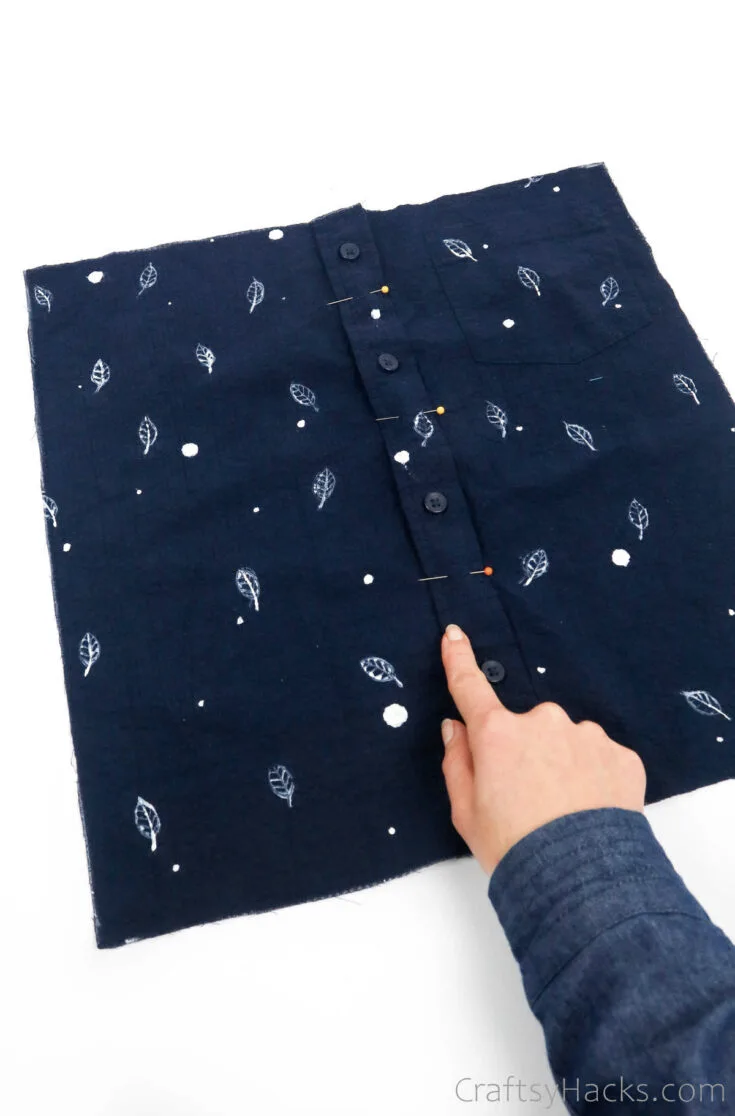
Step 4
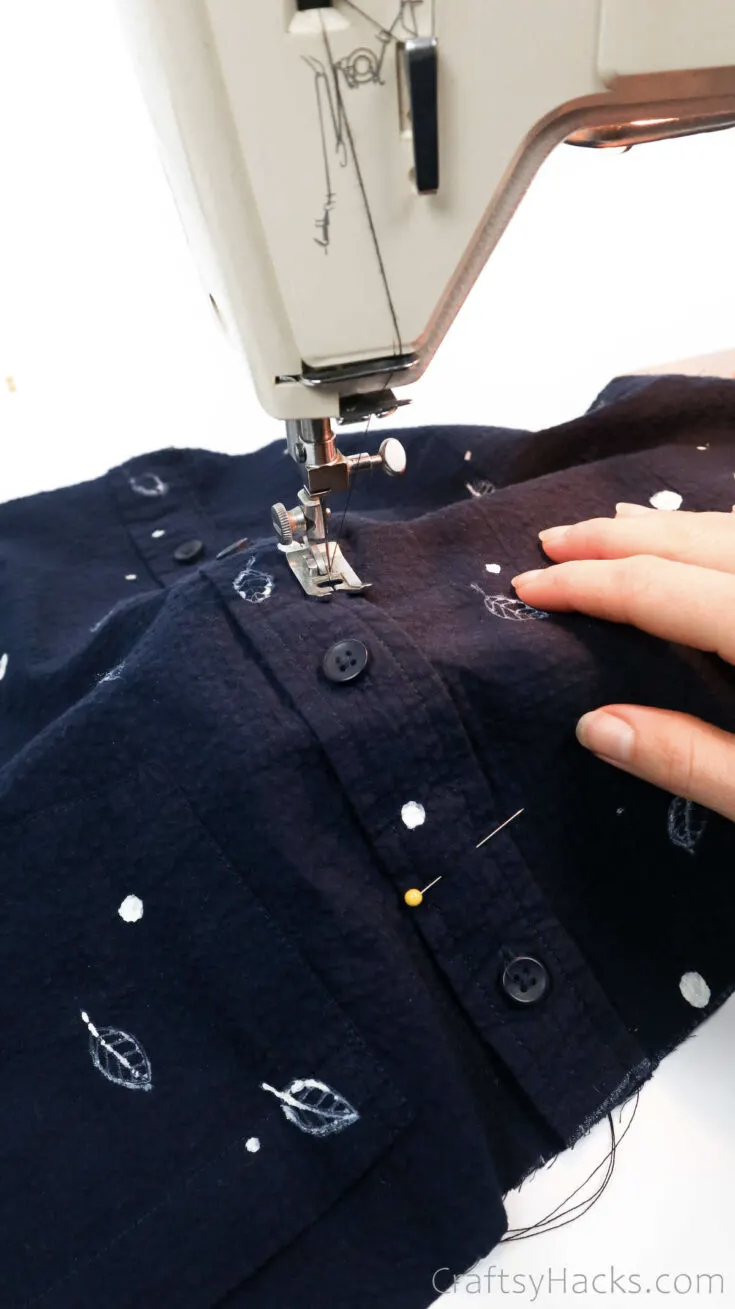
Here’s a little note for you to keep in mind: if you’re using a button-down shirt, there are bound to be gaps between the buttons. Just slide a few sewing pins to secure and close those gaps before you start sewing.
Next, pull out your sewing machine and sew all the way down the button gaps to shut them.
Step 5
You’re also all set to sew your bag; you just have to align the fabric swatches in the right order first.
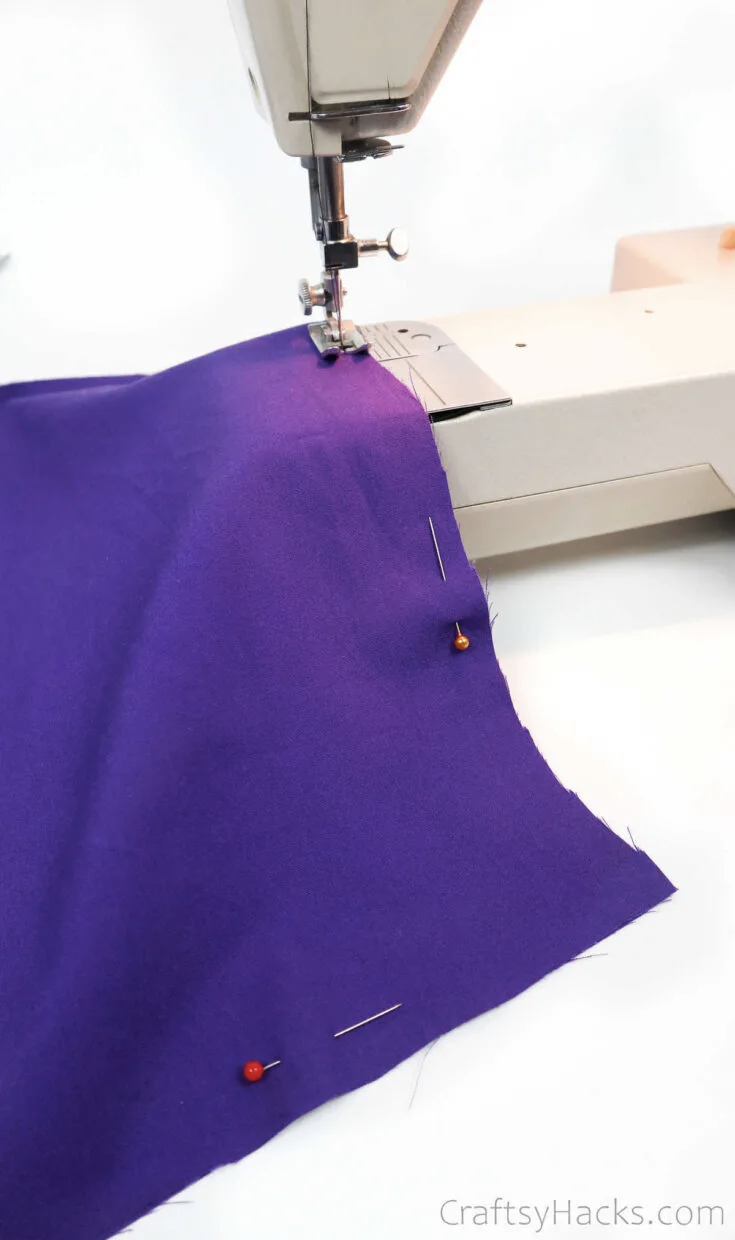
Place the two squares of outer fabric one over the other with the right sides facing inward towards each other. Make sure that the ends are aligned.
Grab a few sewing pins and secure the two swatches on only three sides—the left, right, and the bottom. Leave the top open, of course.
Step 6
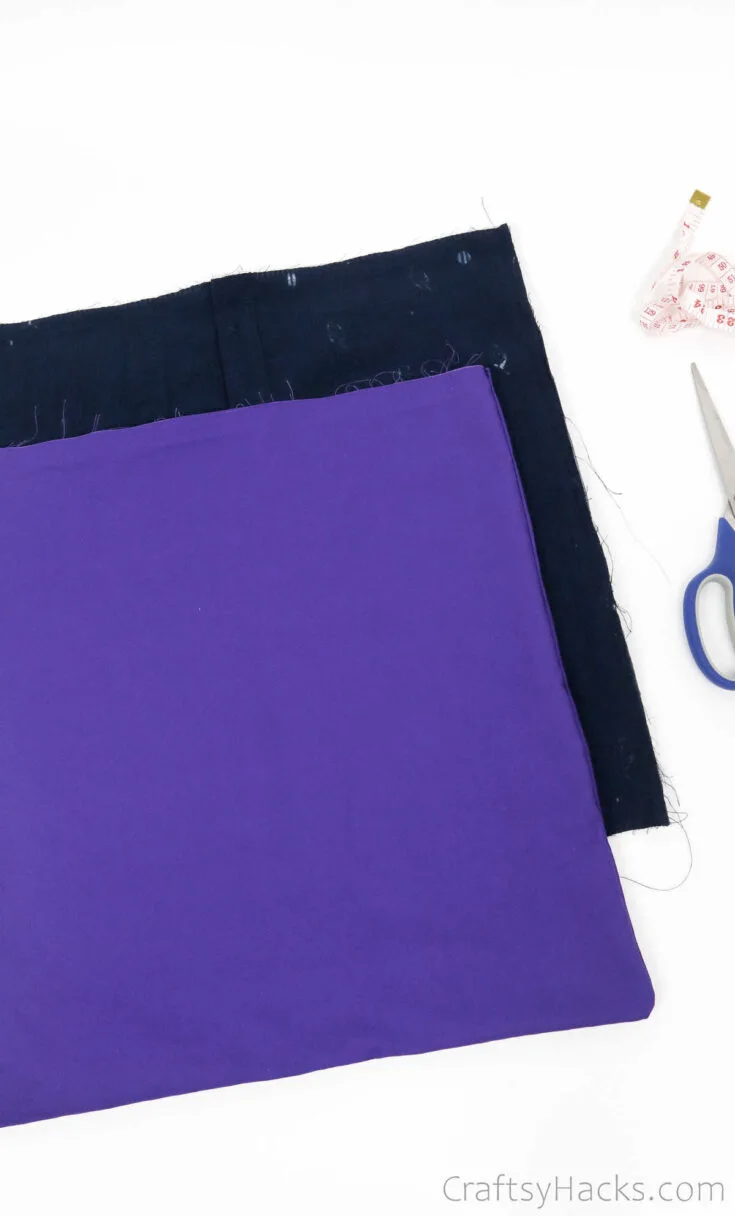
Repeat the same for the two swatches of lining fabric, and pin them in place accordingly.
Next, go ahead and sew the three sides of the lining fabric.
You can sew the outer fabric, as well.
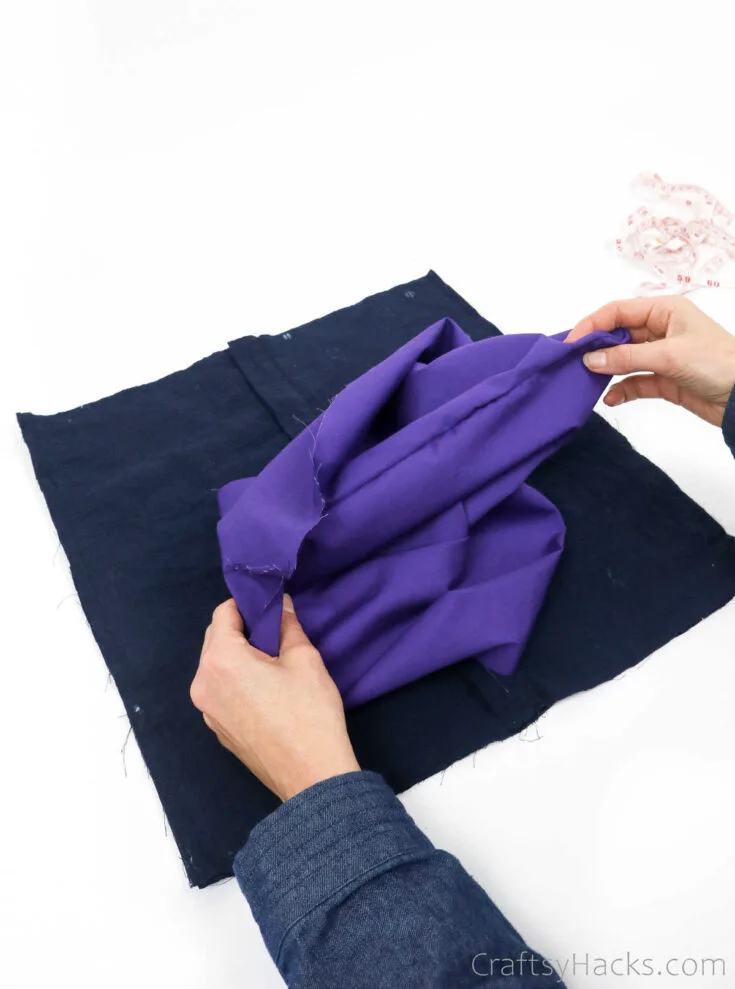
Step 7
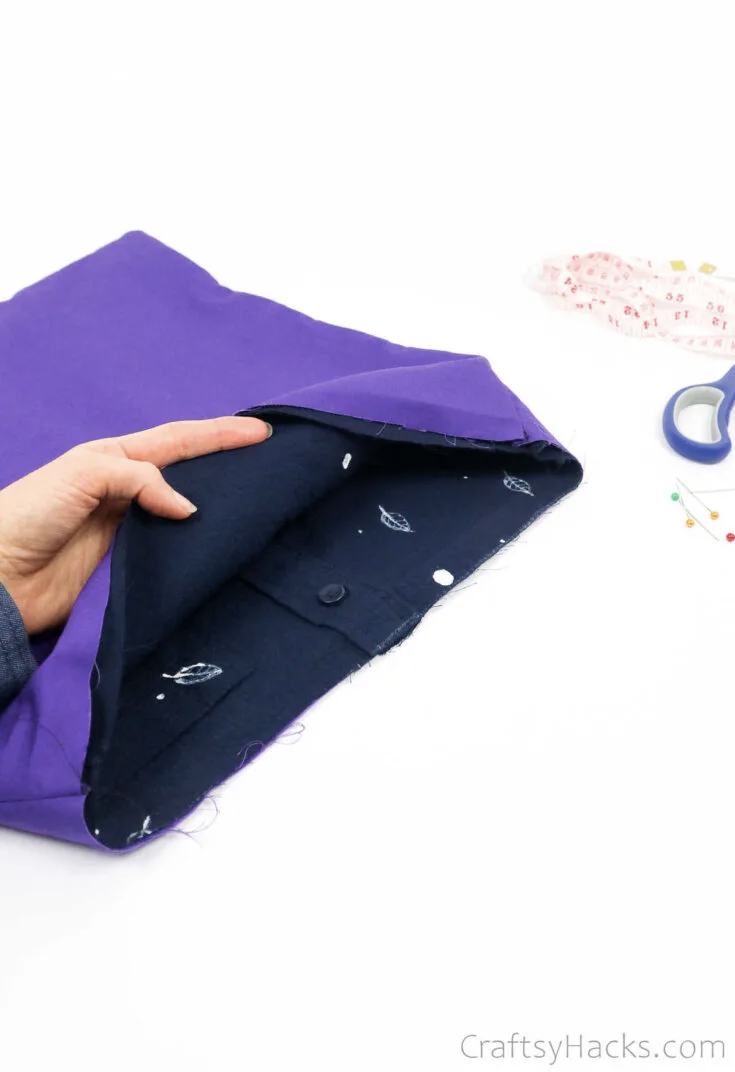
Next, take your lining fabric and flip it out with the right side facing out. Use your fingers to push the edges out while you’re at it.
However, leave the shirt as it is with the wrong side facing out for now.
You’re going to take your shirt fabric and push it into the lining fabric. Make sure that the bottoms of both fabrics are aligned—use your hands to smoothen out the outer fabric inside the lining.
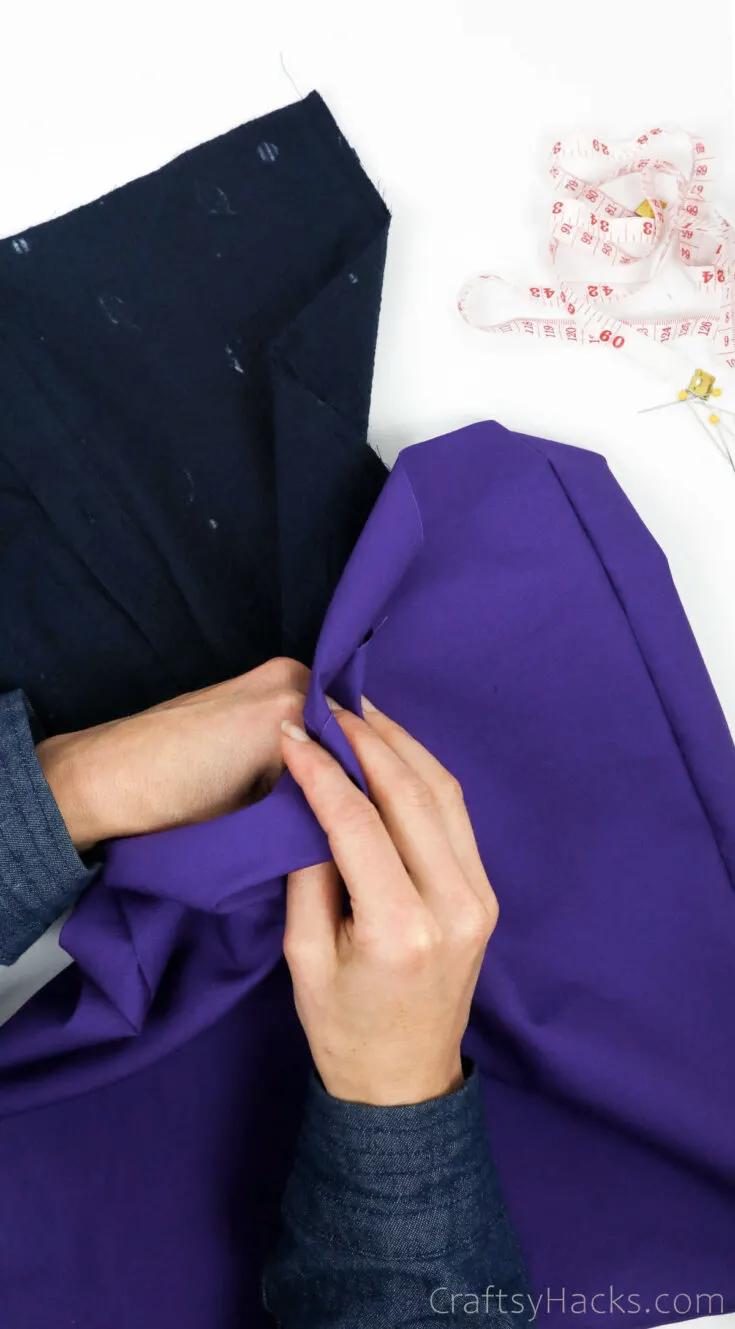
Step 8
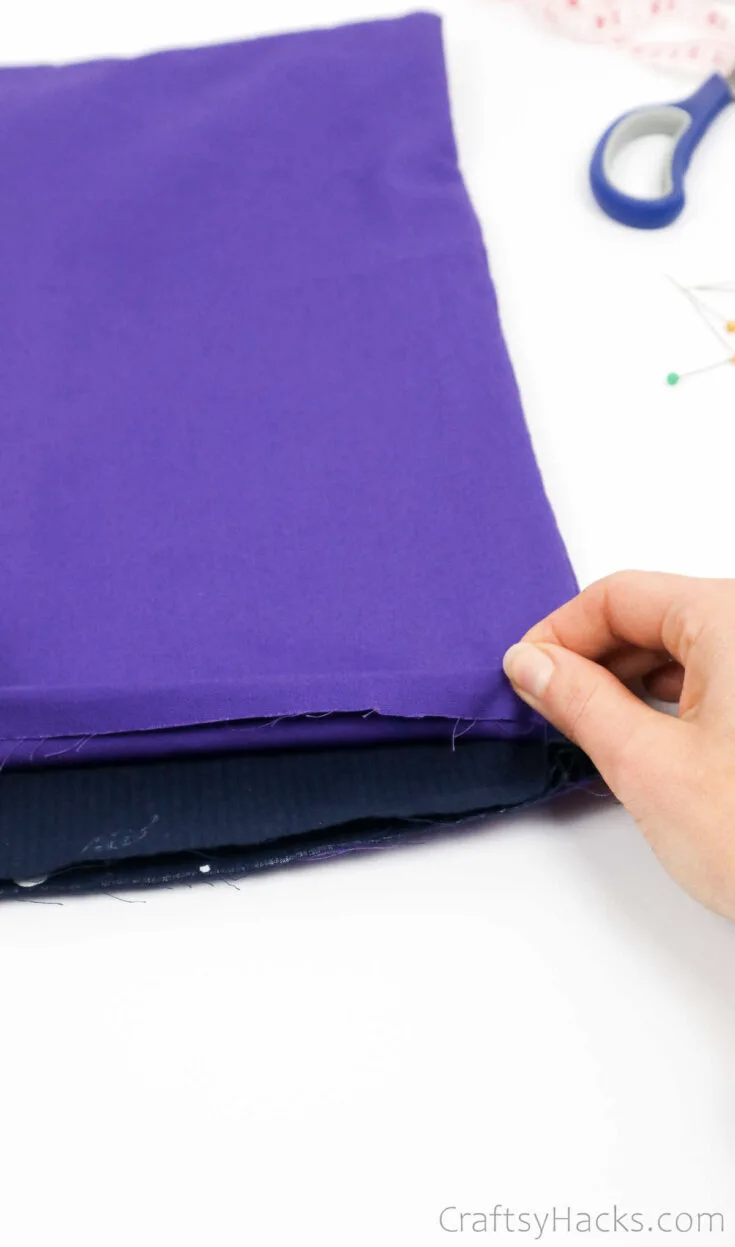
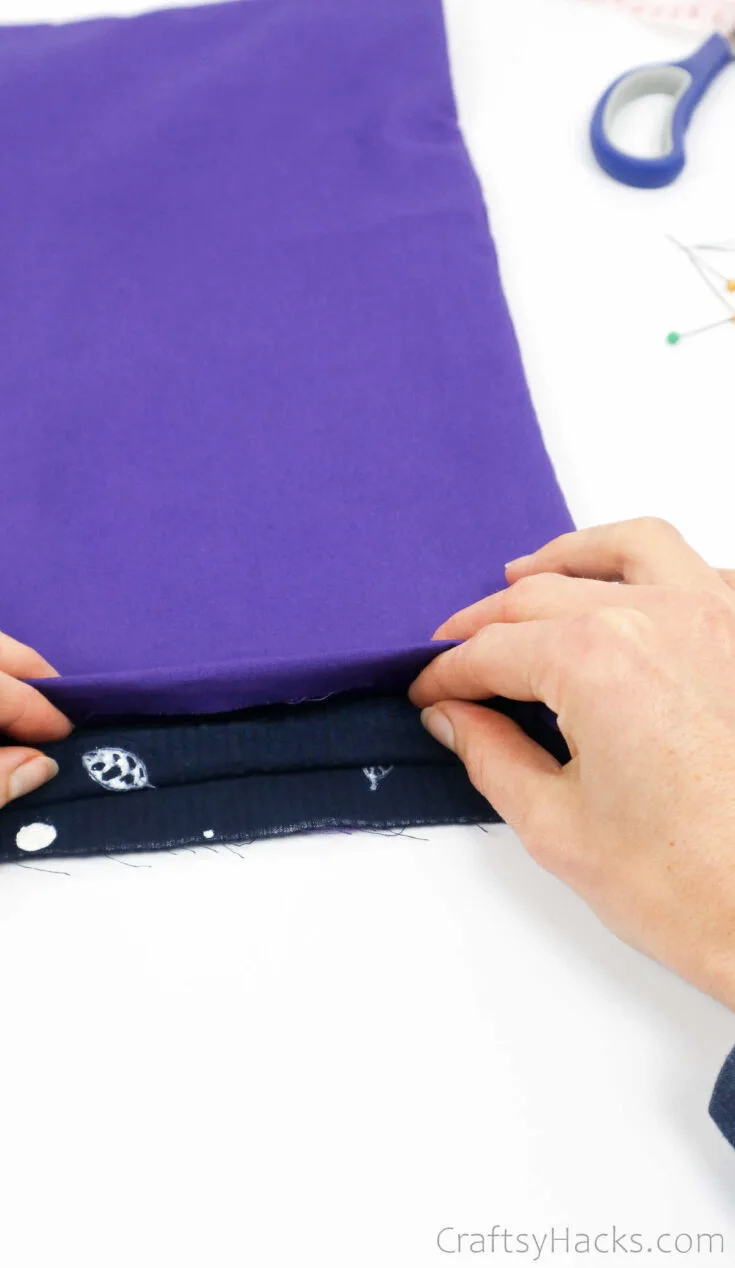
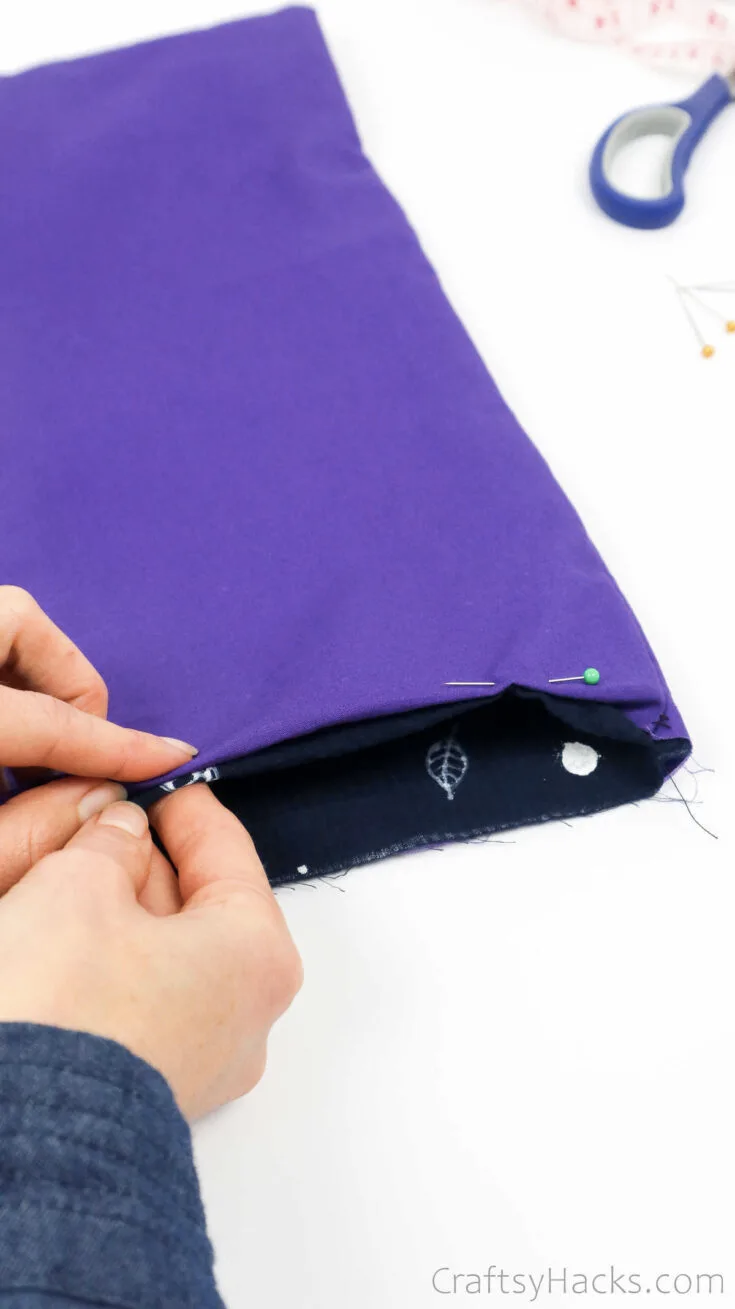
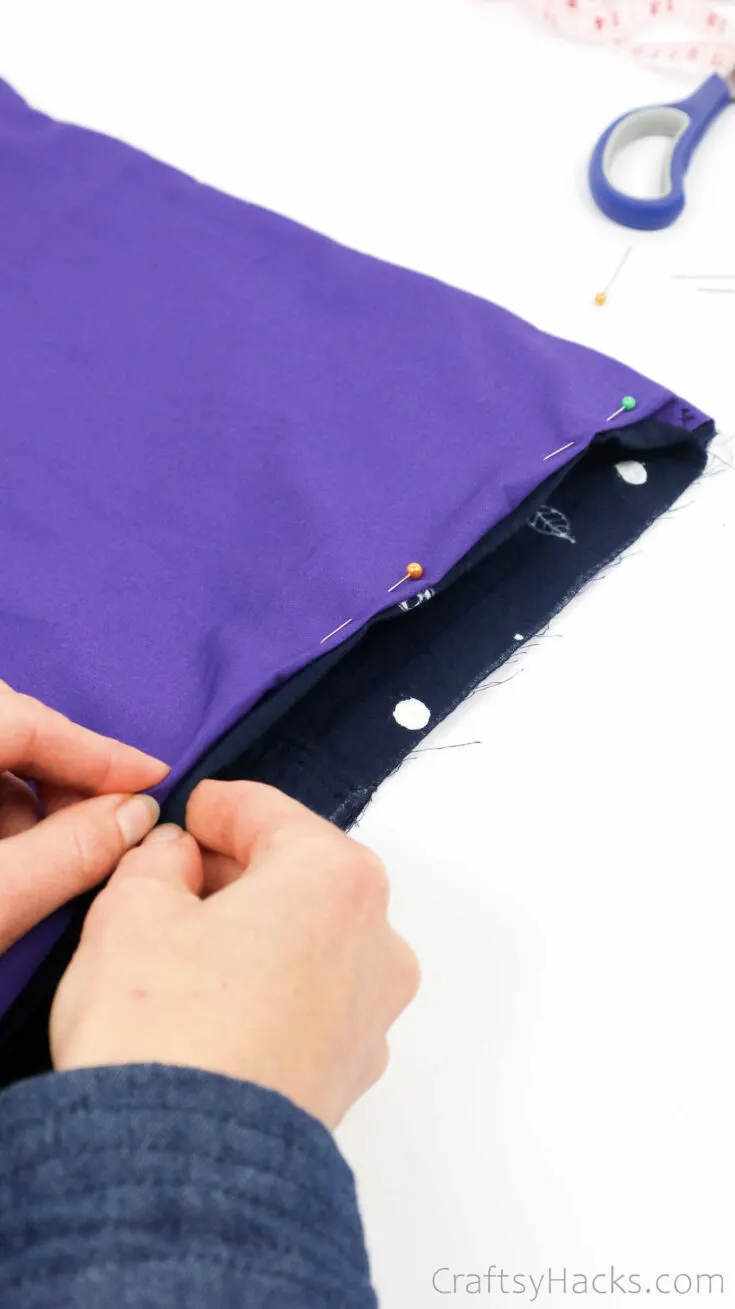
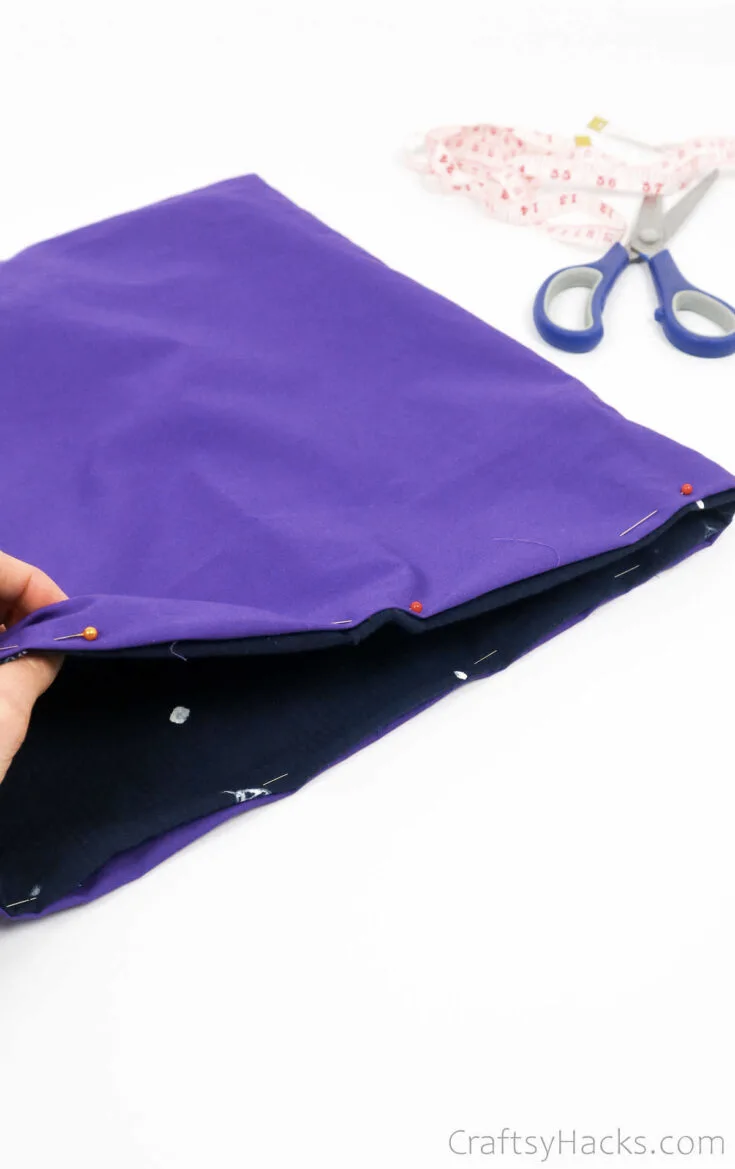
You probably noticed that you still have a few ragged or uneven edges right at the mouth. It’s time you dealt with those!
Just fold the lining and the shirt inward toward the inside of the bag.
You have to make sure that the entire line is even and aligned before you secure both fabric hems with sewing pins.
Repeat this step all around the mouth of the bag until you have an even and aligned rim.
Step 9
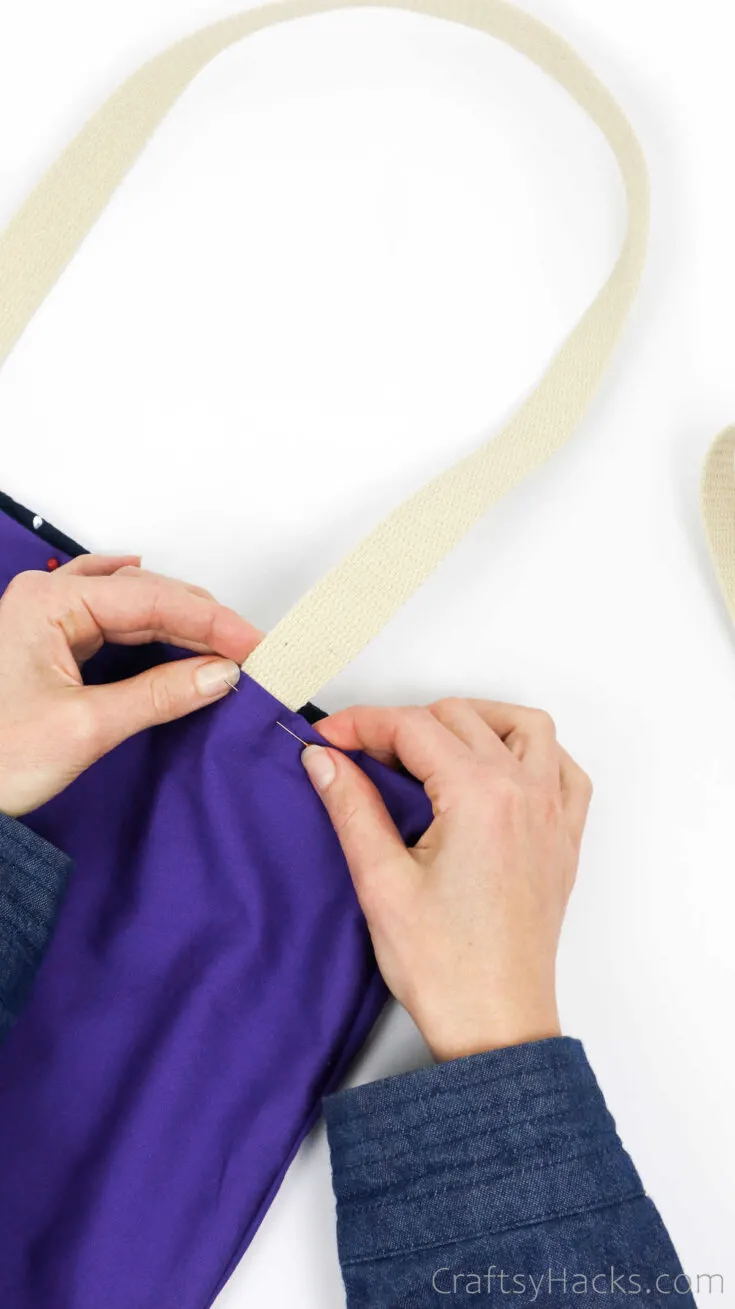
You also have to make straps for your tote bag, so let’s get to it! Cut two strips of cotton ribbon or webbing, each around 36 inches long. You can always customize the length of the straps.
Next, tuck the ends of one strip of webbing into the bag between the lining and the outer fabric, as you can see above.
Grab a sewing pin and secure the straps in place. Remember to check if both straps are even and of the same height.
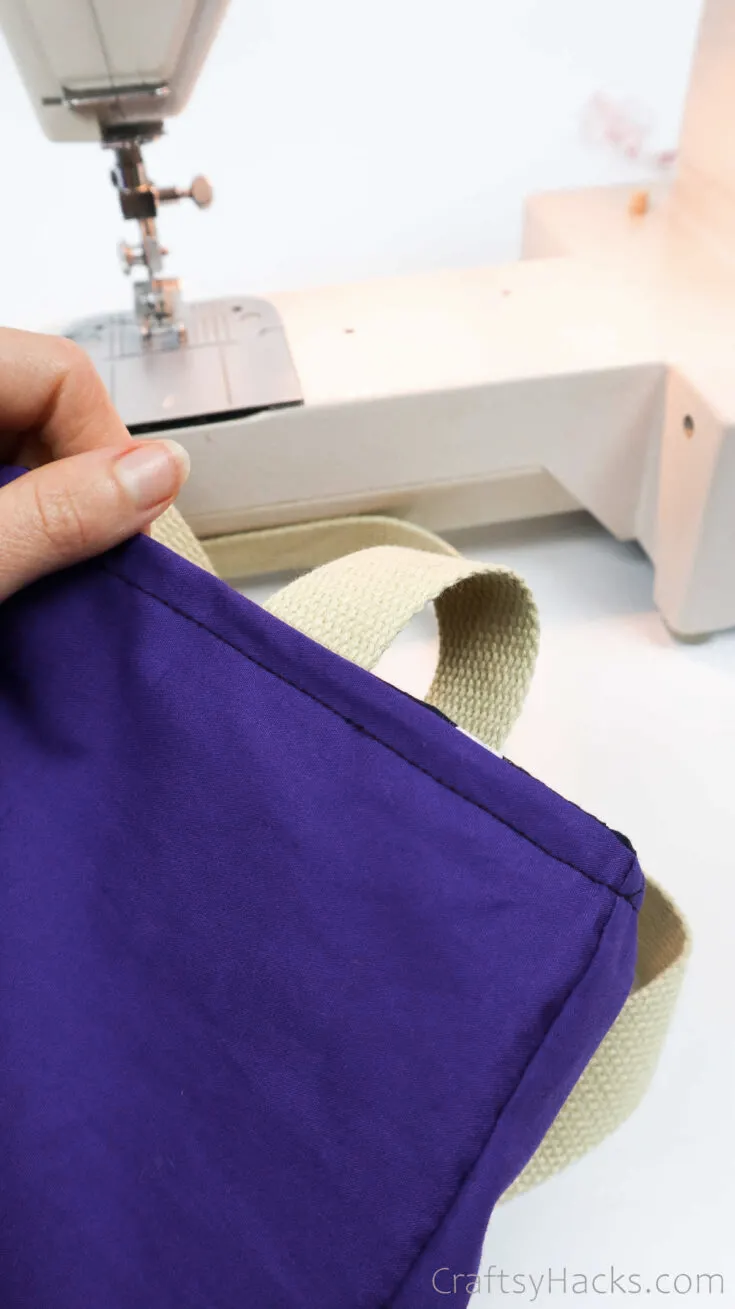
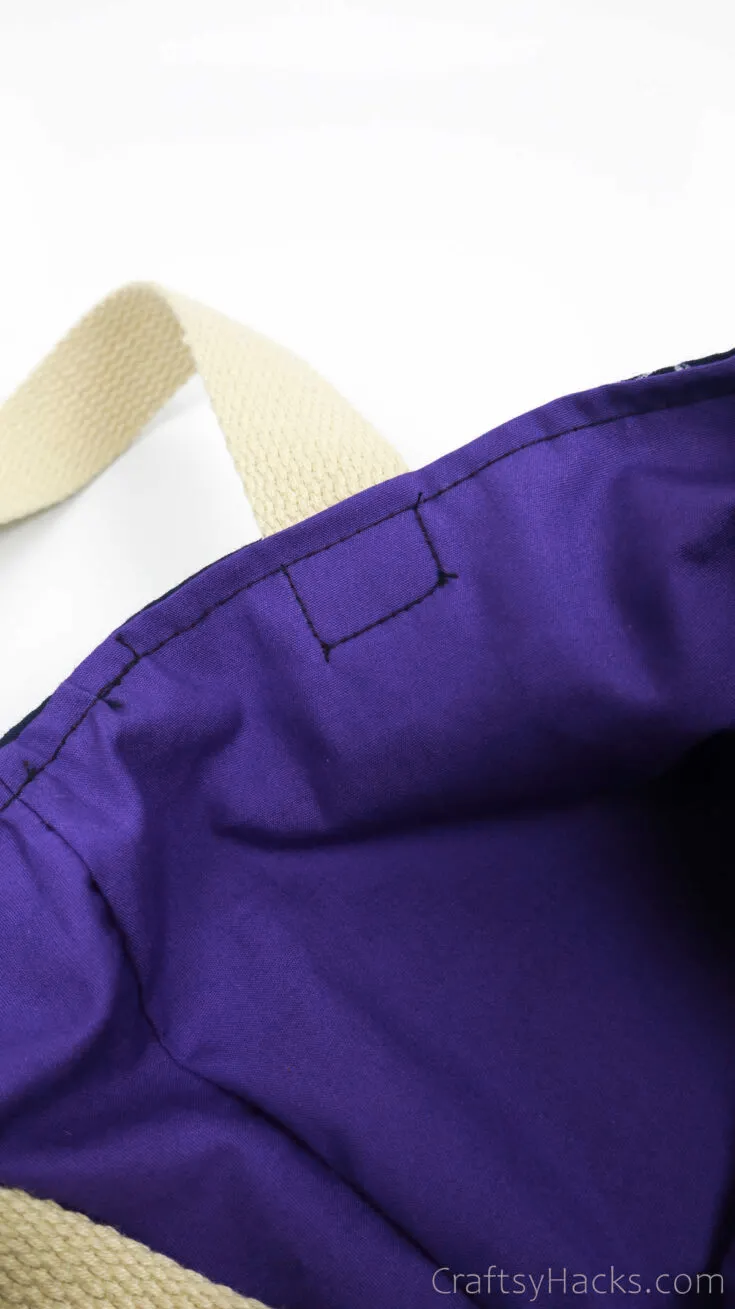
Step 10
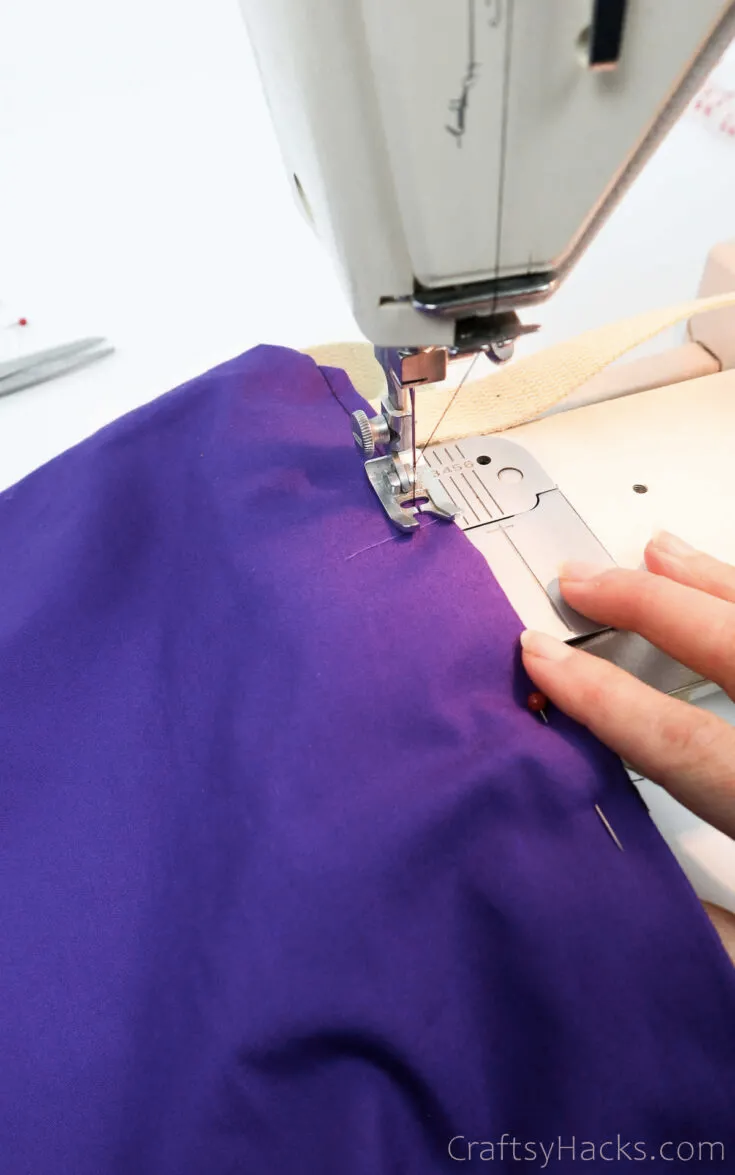
You’re all set to start sewing your tote bag. Go ahead and set up your sewing machine before you start sewing.
If you want to be extra careful and make sure your straps are secure and in place, you can sew around the ends to create a square, as you can see below. This will hold the ends in place quite well.
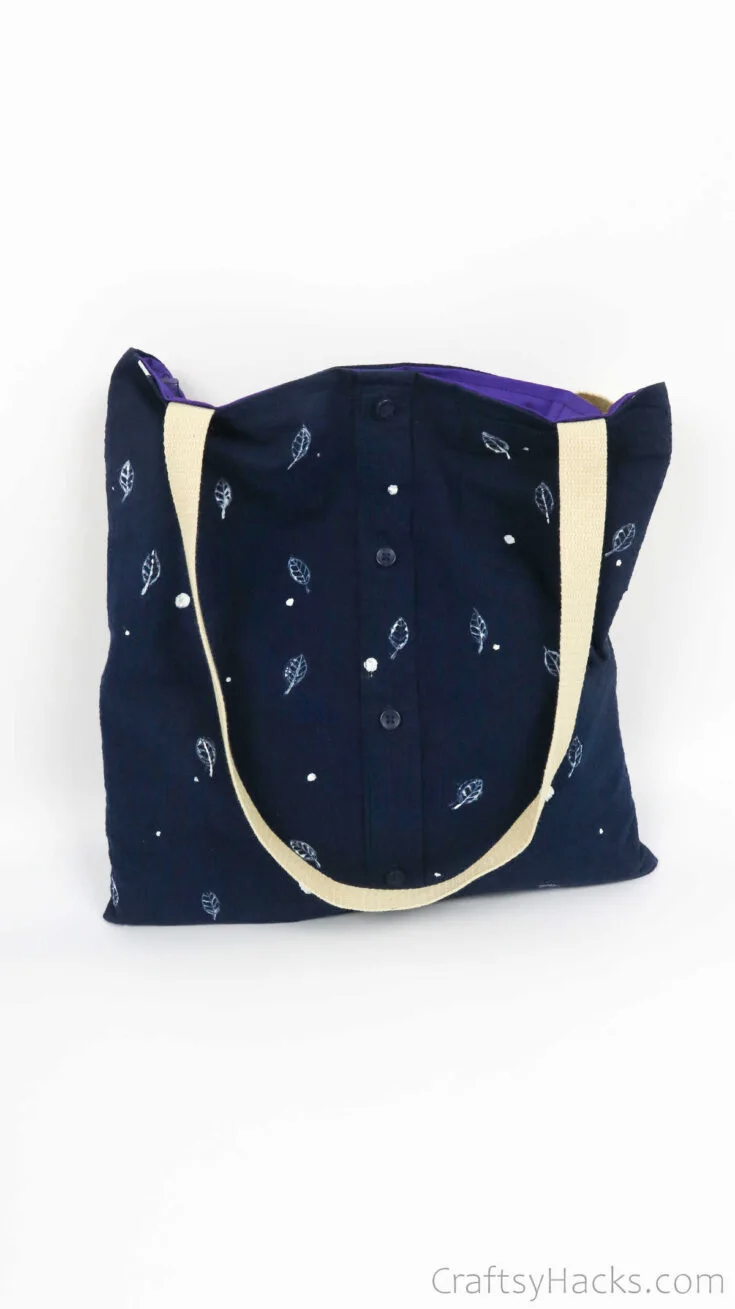
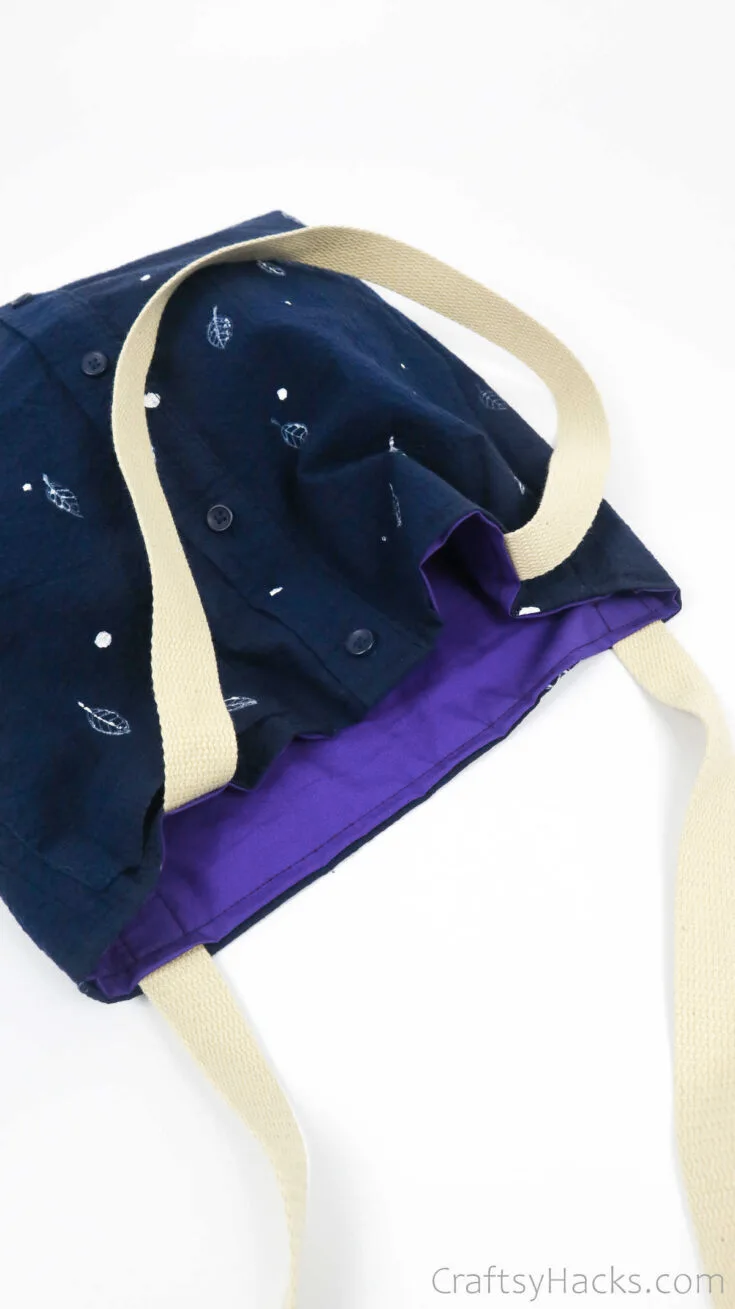
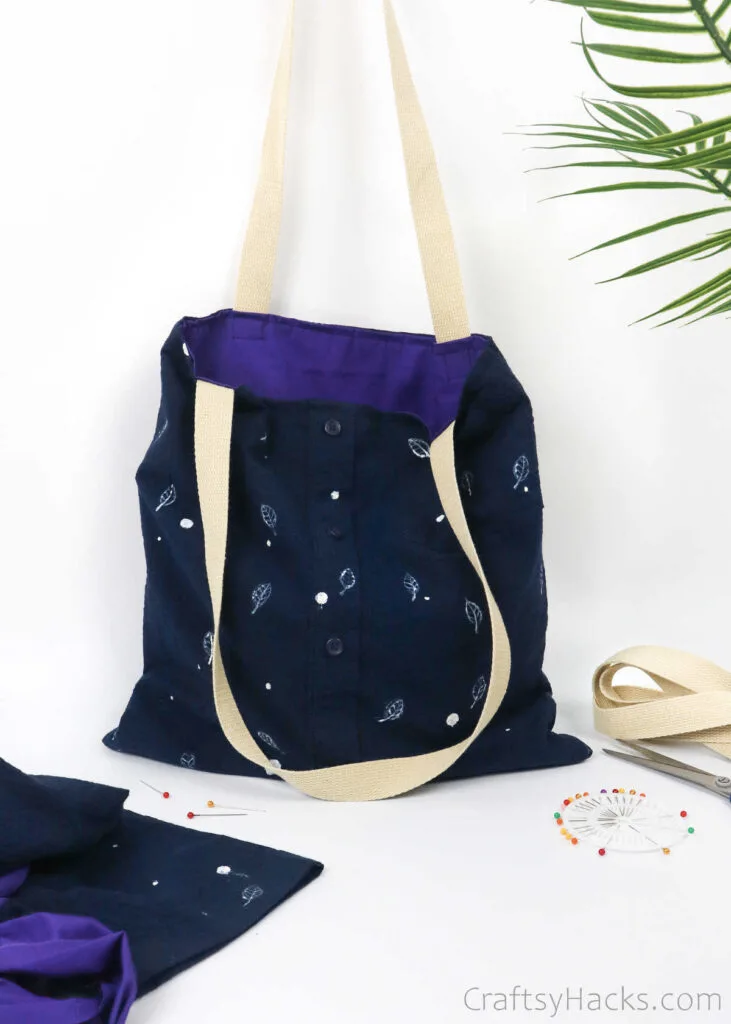
Just flip the bag inside out, and your tote bag is ready to use!
How Much Fabric Do I Need for a Tote Bag?
How much fabric you need for a tote will depend on how big you want your bag to be. Also, the shirt you use will also determine how big your bag turns out.
You will need to use larger shirts for larger bags—men’s shirts are often my go-to choice when I need bigger bags that pull more fabric.
If you remember, you cut the shirts from sleeve to sleeve. That’s often a good marker to keep in mind to determine how much fabric you have at hand and how much more fabric you need for the lining.
Hope you picked up or created an idea of your own using this article.