Late winter is grafting season, and the time of year to graft dormant hardwood cuttings and make some new baby fruit trees! Get your pruners sharpened, your grafting knives sterilized, and all of your budwood cut for another season and start making your own trees. Read on for a step-by-step guide to two easy methods to get grafting.
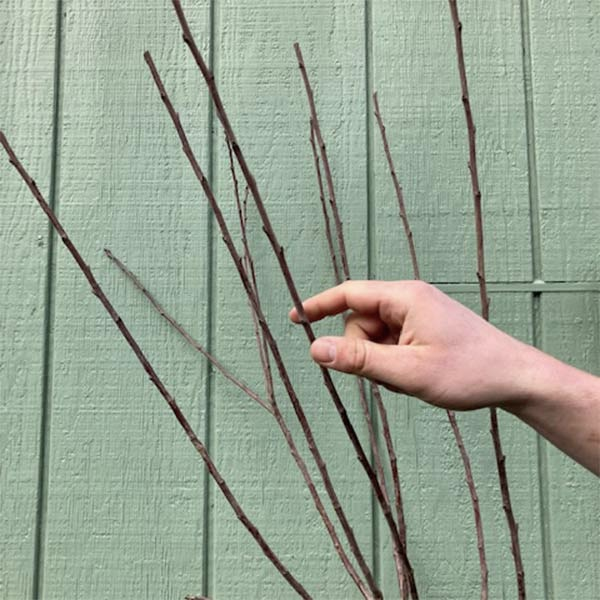
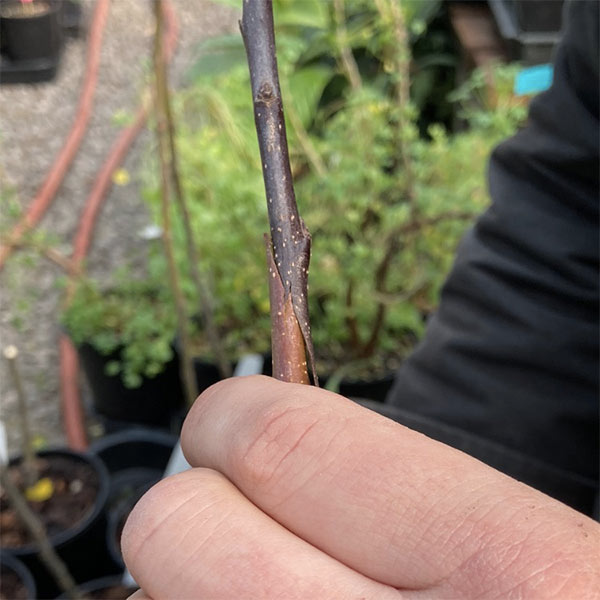
The first step is to collect your dormant scion wood. Scions must be cut while they are still fully dormant for the highest grafting success rate. Be sure to cut wood on new growth that is disease free and growing vigorously. The healthier and more vigorous your scion is, the greater chance of success when grafting and having a fast-growing young tree.
Once your scion is cut, label it and store it in the refrigerator where it will easily keep for at least a month until you are ready to graft.
Selecting rootstock is just as important as selecting what variety you want to grow. Most people think of height at maturity when thinking of rootstock, but disease resistance, vigor, lifespan, soil adaptability, suckering, and how well anchored the tree will be are other factors to consider. Most rootstocks are widely adaptable and resilient, hence their use as rootstock, but checking in with other gardeners/farmers in your area or your local extension agency can help you to choose the perfect rootstock for your location. And of course, trialing many different rootstocks for your location always yields valuable data.
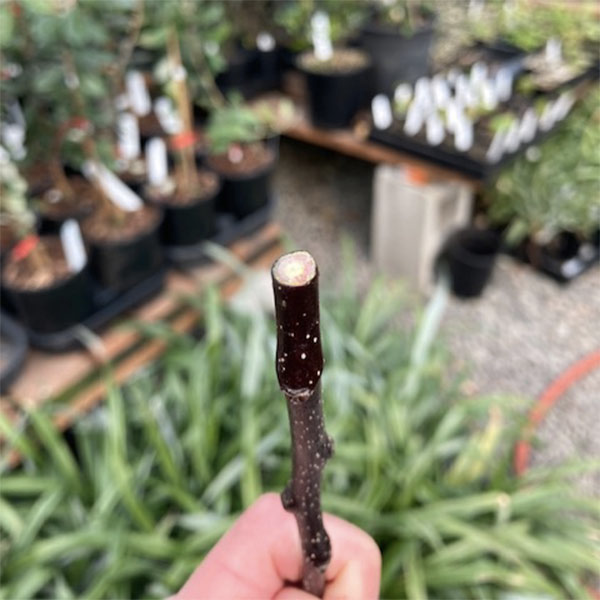
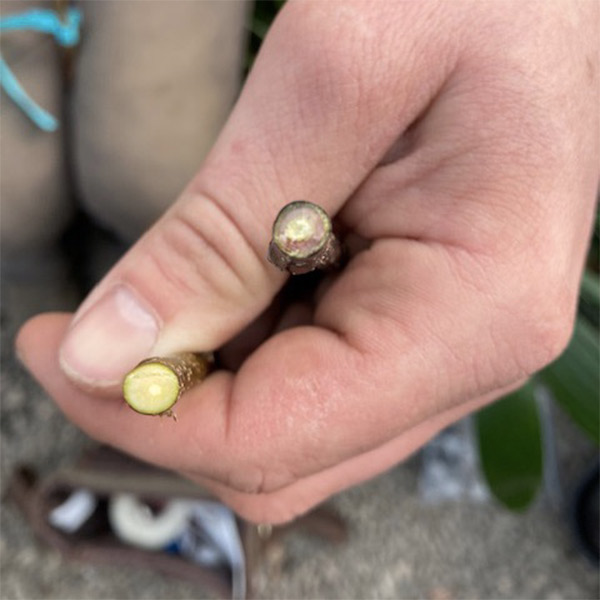
A healthy piece of red fleshed apple scion.
We realized a few years ago in our grafting classes that using red fleshed apples is a great way for beginners to clearly see the difference between the pith, sapwood, cambium, and bark. The pith is that white spot in the middle, the sapwood is red in this case, and the cambium is the lighter layer beneath the dark red bark. The cambium is the most important part here as it is the layer that is lined up between the scion and the rootstock in order to get the vascular tissue to fuse and form a successful graft union.
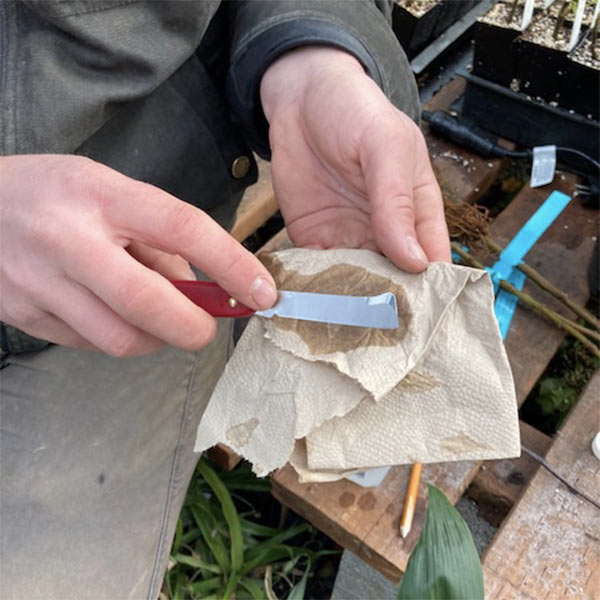
Be sure to sterilize all of your tools before you begin grafting to avoid the potential spread of pathogens across plant material.
When choosing which piece of scion to graft onto which rootstock, it can be helpful to find diameters that are similar so that both sides of the graft match up, but this is not essential. Often the rootstock or scion will vary in size and if you can get one side matched up perfectly then you’ll have success.
The first and easiest graft that most folks start with is the wedge graft. The take rate on these grafts is typically pretty high and you don’t need to have that skilled of a grafter’s hand to have success with it.
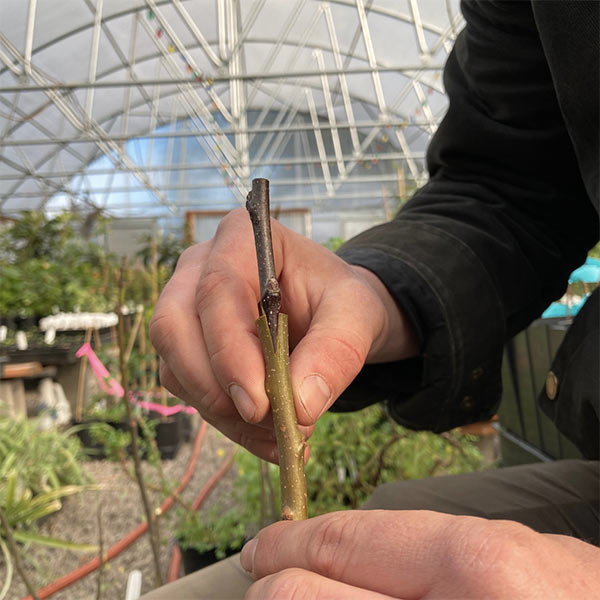
First, make a split down the middle of the rootstock. It is important that the knife cuts the wood cleanly rather than having it split so that a more solid connection between scion and rootstock is achieved.
TIP: We often put our thumb on top of the blade and above the rootstock to ensure that the blade stops when our thumb hits the top of the rootstock. This ensures we don’t cut our other hand that’s holding the rootstock and keeps the blade from making too deep of a cut.
Next, cut the scion wood on both sides to form a wedge that tapers down to a very slim point. It is important to cut at a direct angle rather than “scooping” with the grain of the wood so that there are no air pockets between the cambium layers.
The scion should then fit neatly into the wedge you’ve created in the rootstock with no gaps between the two pieces of wood. It is better to line up one side perfectly than to put the scion right in the middle of the rootstock. Eventually as the young tree grows, it will fuse on both sides.
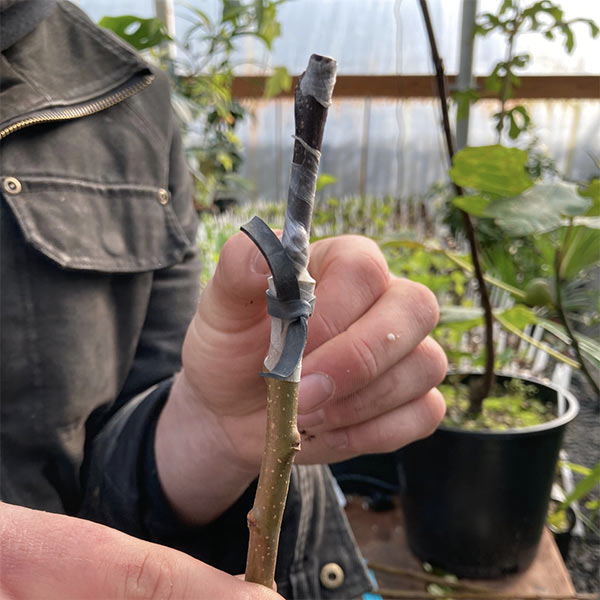
Once the scion is situated, wrap it up with grafting tape and tie a rubber band around to hold it tight so the rootstock is squeezed to the scion. Some growers will wrap the scion completely to keep it from dehydrating, but with apples it’s usually sufficient to put a small piece on the top like a little hat unless it’s a very old or dehydrated piece of scion that you’re trying to save.
The Whip and Tongue Method
Once you’ve gotten the hang of wedge grafting, you can try moving on to the whip and tongue method. The take rate is similar with both methods once you’ve mastered them, although, the whip and tongue has the advantage of lining up the two pieces in a more fluid way. It also has a bit more structural integrity for the young graft because of the interlocking wood.
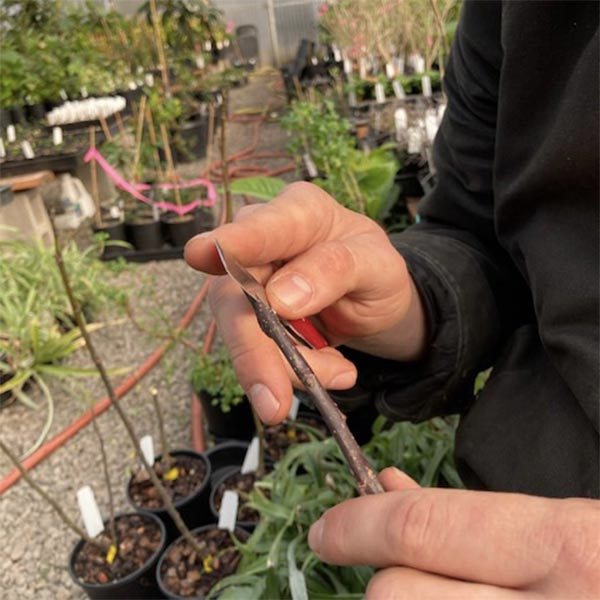
To create a whip and tongue graft, you’ll make a cut about 3/4″ long from one end of the scion diagonally across to the other. After this cut, make the “tongue”, a little incision into the middle of the wood – usually right where the pith is. Create a mirror cut on the rootstock then interlock the two pieces together. The trick here is getting the two tongues on either side of each other. We’ve found the budding tool on grafting knives can be helpful for opening the tongues up a little more so they easily fit into each other.
The interlocking pieces will help the young graft be more resilient to anything knocking it out of place. Follow the same finals steps from above to secure it with grafting tape and a rubber band.
Final Steps
Pot up your newly grafted tree and put it in a frost-free location, but somewhere that is not too warm. We’ve found that for many of the more temperate plants, if they’re put into a warm greenhouse immediately the scion will break dormancy before the graft is fully fused and can then collapse. Other species such as figs and persimmons much prefer a hot environment while the grafts are fusing, but in the case of apples it’s best to either graft them after all danger of frost has passed or put them in a cool hoophouse or garage. The use of bottom heat can be helpful here too as it will cause the rootstock to begin growing and breaking dormancy more quickly while the cooler air above keeps the scion dormant.
Grafting your own trees is a very fun and economical way to propagate young fruit trees. It is also an essential skill for orchardists, nursery workers, and anybody trying to conserve rare varietals. Experiment with different techniques, rootstock combinations, interstems, and materials and you just might discover a unique new way to propagate your favorite fruit trees.
Happy grafting!
Hope you picked up or created an idea of your own using this article.